How to make a manicure with gel-lacquer at home, as in the salon: step-by-step instructions for beginners
Fifteen years ago, girls used to use ordinary nail polish. The process was quite tedious: first you had to carefully apply the coating, then wait for it to dry completely. Today, the traditional nail polish has been replaced by gel-lacquer - a more modern and convenient option. Of course, classic varnishes are still in demand, especially for a quick manicure update, but it is gel-lacquer confidently takes the leading position.
Why has it become so popular? It's simple: gel-lacquer does not require long drying - it polymerises in the lamp in minutes and stays on the nails up to 3-4 weeks without chipping and loss of shine. For comparison, the usual lacquer already on the 4th-5th day begins to rub off and loses its attractive look.
However, to apply gel varnish correctly, you need to have special materials and know the technique of application. In this article, you will find step-by-step instructions on how to make a durable and beautiful manicure with gel varnish at home - no worse than in a salon.
What you need for a manicure with gel varnish: a complete list
To make a perfect manicure with gel-lacquer at home, prepare the following materials and tools:
- Base - the base for gel-lacquer, provides adhesion to the nail plate.
- Gel lacquer - choose any shade you like.
- Top coat - fixes colour, gives shine and protects against chipping.
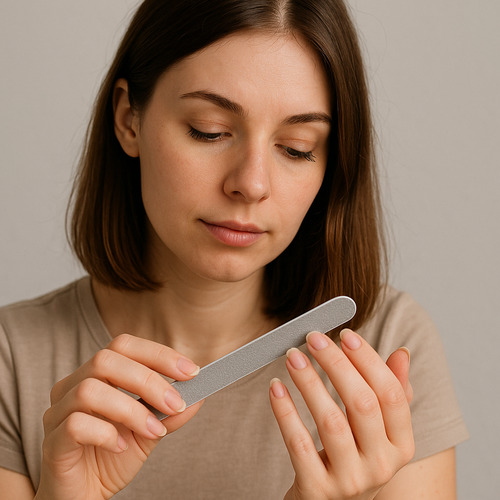
- Nail file - for shaping your nails.
- Buff - used for matting the nail surface before applying the base.
- Degreaser - removes dust and grease, prepares nails for coating.
- Cuticle Remover - softens cuticle for further removal.
- Orange sticks - for pushing back the cuticle and conveniently working with designs.
- Nail lamp - LED or UV, essential for drying the coating.
- Cuticle oil - takes care of the skin around the nail, completes the manicure procedure.
With these products you will be able to independently create a stable and neat manicure, not inferior to the salon.
How to make a manicure with gel varnish at home: step-by-step instructions
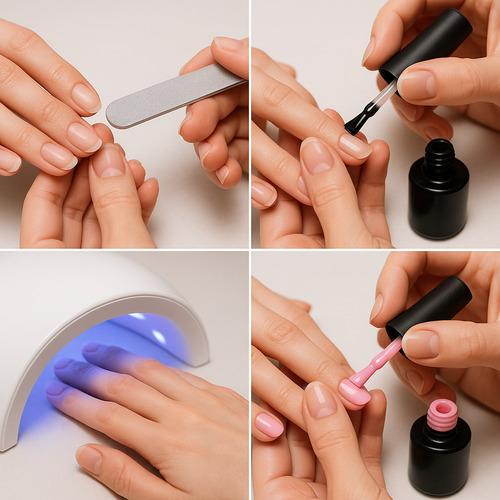
1.Preparation of nails
First remove the old coating, if there is one. Then proceed to cuticle treatment: if you prefer to remove it, use a remuver according to the instructions. Otherwise, gently push back the cuticle with an orange stick. Give your nails the desired shape with a file, then gently polish the surface of the nail plate with a buff. At the final stage, degrease your nails to remove any dust and prepare them for the next step. . 2. Applying the base
Apply a thin layer of base to each nail and dry in the lamp following the manufacturer's recommendations. Please note that there are different types of bases and curing times may vary - make sure you read the instructions to get the best results. . 3. Application of colour (gel varnish)
Apply gel lacquer in 1-2 layers depending on its pigmentation and desired colour intensity. For a more saturated shade it is recommended to apply two thin layers, and for a light and natural result one layer is enough. In any case, each layer should be dried separately in the lamp. Never apply two coats at once without intermediate curing, as this can lead to uneven coverage and flaking. . 4. Topcoat application
After drying your nails in the lamp, apply one layer of top coat and dry in the lamp again according to the instructions. The top will give your manicure a glossy shine and reliably protect it from scratches and chips.
5. Apply cuticle oil
Apply cuticle oil to give your manicure a well-groomed and neat look. It deeply moisturises and nourishes the skin around your nails, providing reliable care. Remember that cuticle oil is useful to use not only after a manicure, but also on a daily basis, so that your hands will always look healthy and beautiful.