If you had to choose between a manicure and a pedicure, we would gladly pick endless foot treatments. But unfortunately, booking a spa appointment for your feet often ends up being one of the most forgotten tasks on our ever-growing to-do list. A busy schedule, a tight budget, and lack of free time turn a salon visit into a real dream.
The good news: a pedicure is one of the few beauty treatments that’s easy to do at home without extra costs. Want to enjoy a spa pedicure that rivals a professional one? Below are 14 simple steps to help you make your feet well-groomed, beautiful, and soft—all without leaving your couch.
1. Gather everything you need
Before you begin, prepare your workspace and all the necessary supplies—this will make the process easier and more enjoyable. We recommend setting up a spacious, comfortable area with a stable surface where you can confidently rest your foot. Running around looking for tools with wet nails is far from comfortable, so make sure everything you need is within reach. Here’s what you’ll need:
✓ Nail polish remover
✓ Cotton pads
✓ Straight nail clippers
✓ Double-sided nail file
✓ Nail buffer
✓ Foot pumice stone
✓ Scrub
✓ Lotion
✓ Foot soak with salts or liquid soap
✓ Orange stick or cuticle pusher
✓ Cuticle oil
✓ Towel
✓ Nail base coat
✓ Nail polish
✓ Nail top coat
Pedicures should be done taking into account the individual needs of your feet. Just like we care for our face, the skin on the soles changes over time: sometimes it needs deep nourishment and restoration, while other times it requires extra energy and toning. This determines the choice of products and tools — lotions, scrubs, and other care items that help keep your feet soft, well-groomed, and healthy.
2. Removing old polish
The first step to a perfect pedicure is carefully removing the old nail polish. Instead of regular cotton pads, which can leave fibers behind, use lint-free wipes. For gentler care, replace standard removers with safe, acetone-free, paraben-free, and phthalate-free options — they are less harmful to nails and skin, especially with regular use.
Apply the nail polish remover to a wipe or cotton pad and place it on the nail for a few seconds, then gently wipe it off. If traces of polish remain, softly remove them with lemon juice. Sometimes the procedure needs to be repeated a few times, but this method remains one of the gentlest and most effective ways to do a pedicure at home.
3. Make a Relaxing Warm Foot Soak
Next, pamper your feet with a relaxing soak using pedicure salt or a special solution for softening the skin — this will make it soft and provide a pleasant feeling of comfort. After the soak, we recommend applying a mask and scrub, then moisturizing the skin with a cream or oil.
If you don’t have a special foot bath, here’s a simple alternative: add a bit of regular bath salt or your favorite liquid soap to warm water. After 10 minutes, when the skin has softened, gently pat your feet dry with a clean towel.
4. Treatment of Rough Skin
Once your feet are soft, gently treat rough skin. You can use a light scrub along with a pumice stone or foot file. Pay special attention to the ball of the foot, the bottoms and sides of the heels, and the area around the toes. Only treat rough areas and heels, avoiding excessive removal — calluses serve a protective function.
5. Cuticle Care
Carefully pushing back the cuticles, filing the nail plate, and removing any protruding or loose skin can be done at home. However, cutting the cuticles is best left to a professional — this should only be done by a licensed specialist.
It is recommended to start care with a soak, as plain water is not sufficient. A mineral-enriched soak effectively cleanses and nourishes the skin, reduces inflammation and redness, improves blood circulation, and helps draw out toxins to
the surface.
After softening the cuticles, a special cuticle remover can be used. It gently dissolves remaining dry skin, providing neat, safe, and professional care.
Tip: If you have ingrown toenails, it’s best to seek professional medical help.
6. Nail Preparation
The most important part of any manicure or pedicure is proper nail preparation. For trimming toenails, use high-quality clippers specifically designed for pedicure. Nails should be cut straight across, leaving a small edge above the skin to prevent ingrowth and maintain nail health.
7. Smoothing the Nail Surface
A perfect pedicure starts with a flawless base. Any bumps or roughness can interfere with creating an even finish, but a good buffer will help. Gently buff the nail surface to even out irregularities and give it a slight texture — this ensures better adhesion of the product.
8. Nail Shape Correction
First, smooth the raw edge of the nail using a file, moving in one direction until the nails are even and have the desired shape. We recommend using a dual-sided file: the fine side for neatly smoothing the edge, and the coarser side for shortening and shaping.
When choosing the length and shape of your toenails, consider your lifestyle. If you lead an active lifestyle, it’s better to opt for short, rounded nails: long nails often hit sneakers, which can cause bruising or even nail loss.
9. Nourishment and Recovery
One optional but especially enjoyable step of a home spa pedicure is a gentle scrub for the feet, heels, and soles. It softly removes rough skin, leaving it smooth and well-groomed. You can use either homemade recipes or ready-made masks for this treatment.
10. Thorough Moisturizing
Finish your foot care routine by using a high-quality moisturizing cream. Apply it with massaging movements from your toes up to your calves — this is not only pleasant but also effectively nourishes and hydrates the skin after a scrub and foot soak.
11. Applying the Base Coat
Before applying nail polish, make sure your nails are completely dry. Then carefully apply a thin layer of nail base, spreading it in three strokes: one down the center and one on each side. Allow the base to dry completely before moving on to the colored polish.
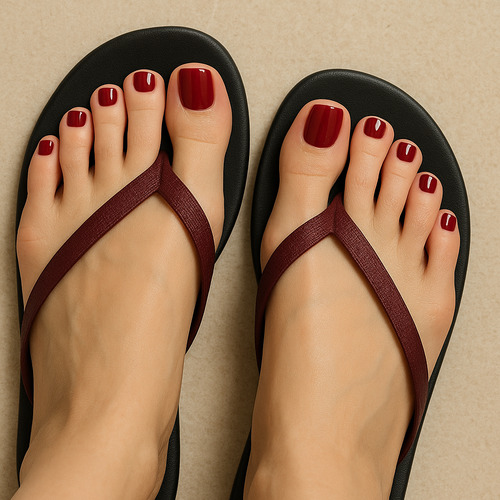
12. Applying Nail Polish
To prepare the polish for use, gently roll the bottle between your hands — this helps achieve the optimal consistency. Apply the polish in thin layers. If your hands shake slightly, don’t worry — this is completely normal. After the first layer, wait about 5 minutes before applying the next.
13. Applying the Top Coat
To seal in the color and extend the longevity of your pedicure, apply a top coat. Gently remove any excess polish or small imperfections with a cotton swab dipped in nail polish remover. Allow the pedicure to dry completely, then enjoy a flawless and long-lasting result.
14. Aftercare
Proper aftercare is key to keeping your pedicure looking perfect for longer. To help your polish last, we recommend applying cuticle oil daily and refreshing the top coat every few days to prevent chipping and maintain nail shine.