Nail extension is a process that is in great demand in the beauty industry. This procedure is not complete without the necessary tools and materials, among which a special place is occupied by extension forms.
In this article we will help you put all the dots on the «i», we will try to figure out what the forms for building are, their types, advantages and disadvantages, How to put the forms correctly.
Forms for building are special templates or stands that are used to lay out artificial nails with gel or acrylic. With the help of them, it is very convenient to spread the modeling material on the natural nail, creating the desired length outside the free edge.
Types of forms for nail extension
Forms for nail extension are usually classified in two directions:
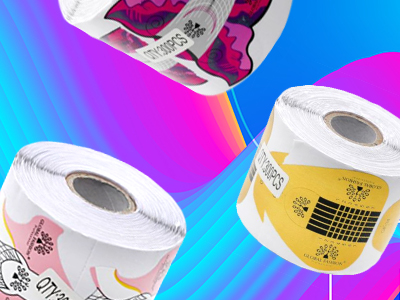
Disposable. They are made of softer materials and can be easily adjusted to fit even the most unusual nail plates. Paper, flexible plastic or foil are used as materials for disposable structures. The forms are attached under the free edge of the nail bed, and gel or acrylic is applied over the structure.
The material of the forms is very plastic, due to which it is very easy to work with it. Depending on the material used for the manufacture of disposable forms, they are:
- paper with metal or polymer deposition on the contact layer.
- forms based on metal foil.
- based on plastic or polymer (sometimes transparent, which is very convenient for modeling and design).
- as well as a combination of all the above forms.
Reusable. To create reusable molds, a hard plastic is used that is resistant to creasing. They are easy to use and facilitate the modeling process. Reusable templates are more expensive because they are made from quality materials and can be used many times. It should be noted that when using reusable forms, they must be sterilized after each use. According to the methods of extension, reusable forms are divided into two types:
- lower forms.
- upper forms.
Build-up using bottom forms
Using the lower forms, the master will be able to create any nail model. Starting with a crisp square nail, ending with elongated sharp tips. The use of lower forms gives the craftsmen the opportunity to show their imagination and form an artificial nail of any shape and length. The lower forms are used in the following steps:
Step 1. The hands and the nail plate of the natural nail are processed. To do this, the client's hands are treated with a disinfectant, the nails are degreased, sanded with a special file with medium abrasiveness, covered with a primer (dehydrant) and allowed to dry.
Step 2. Setting the shape to the free edge of the nail plate. To do this, the form is wound under the free edge of the nail and fixed with fasteners on the finger. It is important that the mold is installed evenly, without gaps. In the case of an uneven position, the material used will fall into the gaps, and the surface of the artificial nail will turn out to be uneven.
3 step. When the bottom molds are attached to each nail of the movie, the master can start building. When working with forms, acrylic or gel is usually used. Both of these materials have excellent contact with any kind of forms and tips for building up and lie flat on the surface.
Build-up using top forms
The upper forms look like nail tips, but there is a significant difference between the two materials. If the tips are used during the extension and remain on the nail, then the reusable upper forms are removed after the extension procedure is completed. Build-up on the upper forms occurs in the following steps:
1 step. Preparatory work is underway with the surface of the nails. Nails are degreased, polished.
2 step. At the end of the necessary procedures, a form is selected according to the size of each nail, on the inner side of which the material used for building (acrylic or gel) is applied in an even layer and evenly applied with the inner side to the nail, pressed tightly.
Step 3. When the material is completely frozen, the forms should be carefully removed. The resulting surface will only need to be slightly trimmed and given the necessary outlines of the desired nail shape.
Benefits of using nail forms
- the ability to create various and unusual shapes of nails.
the client's own nails are well compressed, so they look thin and graceful.
- the nails do not turn out to be flat, since the integral structure of the nail plate is created.
- when using the upper templates, the stress zone is correctly formed and it is possible to make the same arch on all nails.
- with the help of forms, nail extension becomes an easier procedure - the gel spreads to a lesser extent on the plate and it is much more convenient to form it.
- this technique leaves much less room for mistakes, the result is almost always excellent.
Forms of extended nails
There are many different forms of extended nails. The following forms have become the main types of extended nails:
1. «Square» shape The characteristic features of a square are parallel lateral lines of equal width along the entire length of the nail and a straight tip with sharp corners at the edges. Ideal for French manicure. However, this form is more stable in the case of extended nails, because natural plates often break off in the corners.
2. Shape «Soft square» This shape is a square at the base, but with smoothed corners. Will look great in both short and medium versions. This shape is not so susceptible to deformation during regrowth and does not so clearly indicate the flaws of the manicure.
3. «Oval» shape The most classic. The characteristic features of the oval shape are parallel lateral lines, the same along the width of the entire length of the free edge of the nail and rounded tips. This shape of nails is universal and will decorate the hands of every woman. Manicure with oval nails looks very sophisticated and feminine.
4. Form «Almond» Characteristic features are a conical shape, the lateral lines of the nail from the line of the beginning of the free edge gradually tend to the center and are rounded at the tip of the nail. Almond-shaped nails are at their peak. The almond shape is considered to be the most difficult to perform. It is important to maintain the correct proportions and give the tip a perfect pointed look.
5. «Stiletto» shape Characteristic features - very long tapered nails with straight edges in front, tending to the center, and forming an acute angle at the top. The profile also has a straight outline. Outwardly they resemble daggers, hence their name.
Exotic forms
1.«Pipe» form Characteristic features are the same outlines as that of stylets, but unlike the first marigolds "pipe" have a less pronounced angle of inclination of the lateral edges of the free tip, and the tip itself is almond-shaped. In the cut, they resemble a tube, hence their name. Suitable for any shape of the nail bed. Looks preferable in long lengths.
2. Form «Blade» Special features - the free edge is triangular in cross-section. Straight edges, which may widen slightly closer to the tip, and then sharply tend to the center, forming a fantasy butterfly-wing cut. The look with such nails looks original and creative. Not every master can perform this form, it requires certain skills, knowledge and, of course, patience.
3. Form «Age» Characteristic features are straight parallel lateral edges, which sharply narrow in the middle of the length of the free edge, forming an acute angle at the central apex. They are a mix of a square and a stylet. The form is quite popular, it looks elegant and stylish.
It is clear that these are not all forms, there are much more of them, and they are very similar to each other, but we have described the most popular.
Length of the form of extended nails
Forms of extended nails exist in various lengths:
- short - 2-5 mm (versatile and comfortable)
- medium - 5-10 mm (also universal shape and the most convenient).
- long - 10-15 mm.
- ery long - more than 15 mm (most often they are increased for competitive entries, since the «Soft Square» building increases the possibility of choosing both nail shapes and designs on them. In everyday life with such nails it is difficult to live more than a day - in everyday life they are all are very inconvenient).
How to put the nail extension forms correctly
Forming the shape is one of the most important stages in nail modeling. Not only the appearance of nails depends on this, but also their strength, and even the safety of a natural nail.
Method of using the form:
1. Prepare a natural nail for nail extension: push back the cuticle with a pusher, shorten the free edge, remove the shine with a 180 grit file.
2. Using a soft file, for example 180 grit, we shape the free edge, as much as possible resembling a smile line, and also remove the «corners» to make it easier to tighten the nail and they do not shine through after laying out the camouflage material.
3. Preparing the form. Glue the metal backing from the inside. Using sharp nail scissors, cut out the shape along with the metal backing according to the growth line of the hyponychium.
4. We select a tube to form an arch of the required diameter - it should not be much narrower or wider than a natural nail. We squeeze the surface of the mold with a metal substrate clearly in the center. After this procedure, the perfect symmetrical arch is fixed on the form and we can start working.
5. Set the shape to the nail. Make sure the center line on the shape is clearly aligned with the center axis of your finger - it does not point to the left or right. Look at the positioning of the form from the side - it should not be facing down or up. If necessary, you can again compress the mold together with the metal substrate along a tube of the required diameter.
Indications for the use of forms for building
- When the client has a clear intolerance to any of the ingredients of the tips glue.
- If the nail plate is too narrow, flat or wide, as well as in cases where the nails are too chewed and it is impossible to pick up tips to them.
- For very thin natural nails that can crack during filing.
- In cases where the nail plate is too soft and it can begin to exfoliate after gluing the tips.
- If the surface of the nail is too deformed and there is a high probability of the formation of air bubbles under the gel for building.
We think that this article was good for you and you managed to find answers to many questions.