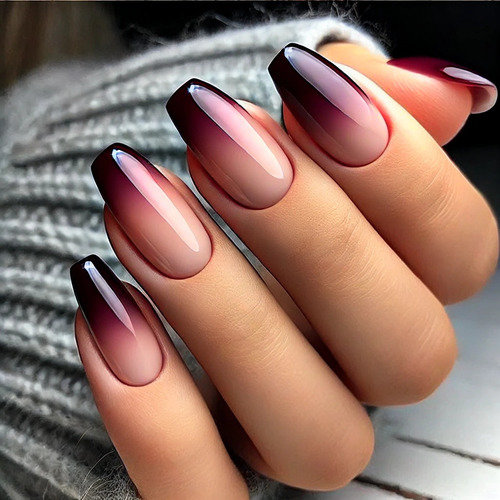
Ombre manicure or gradient manicure is a smooth transition from one colour to another, creating a beautiful and stylish effect. This design can be done by yourself if you follow simple recommendations. In this article we will share step-by-step instructions for creating an ombré manicure for beginners.
Advantages of ombré manicure
- Looks elegant, emphasising style and sophistication;
- When using nude shades, outgrown nails retain a neat and well-groomed look;
- Suitable for all styles and occasions, from casual to formal;
- The rich colour palette opens up endless possibilities for combinations;
- Easy to combine with other manicure styles;
- You can add rhinestones, glitter and other elements to create a unique look.
- Universal and ideal for all types of nails, whether short or long, oval or square.

Step-by-step instructions for doing a gradient on nails
An ombré manicure looks amazing on nails of any length and shape. To create the perfect gradient, you will need the following tools and materials:
- Nail Base;
- Nail Top;
- LED/UV lamp for drying nails;
- Nail polish remover;
- 2-3 shades of nail polish of the same colour range (from light to dark);
- A dishwashing sponge or make-up sponge;
- Cuticle oil;
- Brush for cleaning;
- A thin paint brush;
- Orange stick;
- Scissors.
When all the necessary supplies are gathered, you can safely begin the process.
1. Prepare your nails for polish application: remove the old coating, gently push back the cuticle and carefully grind the nail surface for perfect smoothness.
2. Choose lacquers in several shades, combining both close in tone and contrasting colours. This will create an elegant manicure, in which bright accents will emphasise the harmony and individuality of the design.
3. Apply the base to your nails and dry under a UV lamp.
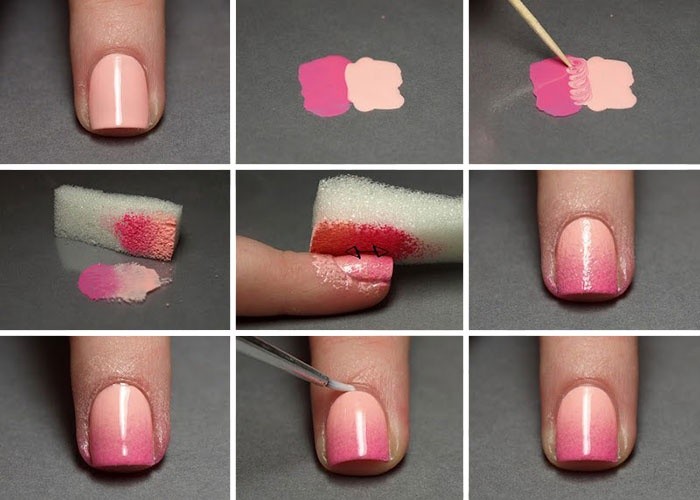
4. Use a soft sponge to blend the colours. Trim the sponge or dish sponge so that it is exactly the width of the nail or slightly wider.
5. Apply three straight lines of polish on the sponge, starting with the lightest shade and gradually moving to the darker colours. Let the polishes overlap each other slightly on the sponge to create a smooth and seamless gradient.
6. Apply the ombré to your nails by gently blotting the sponge with the polish and patting it onto the nail plate. Make sure that all three shades are evenly distributed on the surface. Repeat the process for each nail, ensuring a smooth transition between the colours.
7. Apply the top and dry in the lamp immediately to prevent chipping and keep the colour in perfect condition.
8. Remove excess nail polish from around your nails. Use a brush and nail polish remover to gently clean the skin.
9. If imperfections appear on the nails, gently correct them with a thin brush dipped in polish, working around each contour of the nail bed.
10. Use cuticle oil to moisturise and nourish the skin around your nails, preventing it from becoming dry and cracked. This will help to keep your nails healthy and also give them a well-groomed and beautiful look.
Creating the perfect ombré manicure is easier than it looks! By following a few simple steps, you can make a beautiful and stylish manicure at home.
Read also: Advantages and disadvantages of matte manicure: when and how to wear it?
Read also: Advantages and disadvantages of matte manicure: when and how to wear it?

